How I know God guides my photography.....

"The heavens declare the glory of God, and the skies announce what his hands have made. Day after day they tell the story; night after night they tell it again. They have no speech or words; they have no voice to be heard. But their message goes out through all the world; their words go everywhere on earth."
Psalm 19: 1 - 4 (NCV).

Every time I look through the lens of my camera I see God working. Every day He reveals His majesty. Every night He shows me how He creates beauty even in the darkness. Even if I had not known Him before I started taking photos, the moment I looked at His creation up close (or far away) I see His glory and He guides me to see His beauty in all He has created. Photography just allows me to capture an image of what He has created.

Tuesday, December 23, 2008

Bodie Ghost Car

Black and white photography can give you a different perspective on life and how we view it. It can be stark and ominous, or it can (even in its opposite light forms) be warm and inviting. Bodie, California affords you more than a days worth of shots. This shoot can be done in a day; however it will take more than day to get in a days worth of discovery and memories. Get their as early in the morning as you can (may want to come up the day before and spend the night in Bridgeport). Winter is rather a tough time to visit this old California ghost town (someday I’d like to try that), but I find the spring and fall to be the most hospitable times to visit. Summer can be hot and windy.

This old car was a subject I spent some time with; first in color, then in black and white. The color was nice; however, when I started converting over to black and white, I saw a different side of this car I had not expected to see. Because of the various shades in the photo I imagined it was alive and waiting to be taken for a ride. Here you can see the dim lights of its low beam begging to light the way out of this old forgotten town. All this happened on September 12, 2007 (about 11:12 A.M.). This was a hot and dry day without a cloud in the sky.

Bodie is a small state park on the eastern side of the Sierra Mountains. It’s just north of Lee Vining (near Mono Lake) and south of Bridgeport, California on Hwy. 395. It’s not on the main highway, so you have to look for the turnoff or you’ll miss this great experience. There is a small (dirt type road that the State of California has named State Route 270) that takes you from Hwy. 395 to the town of Bodie (Bodie State Historic Park)… There are several old cars near the cross section of Union Street and Park Street. Don’t worry about missing them; if you’re in Bodie you can’t miss them.

Well, I shot this picture with my Pentax K10D with an ISO speed rate of 200. I shot at 1/350 second with the F-stop at 9.5. Lens focal length was 73mm (from about 25 feet away) – that a focal length in 35mm film of 109mm. I had the sun almost directly over my back and I used a polarizing filter to get the sky to darken a little (it was almost powder blue and very flat without it).


------Car as first shot.


Car as art..................
Monday, December 22, 2008

Monterey Bay Boats ~ Photo to Art Work

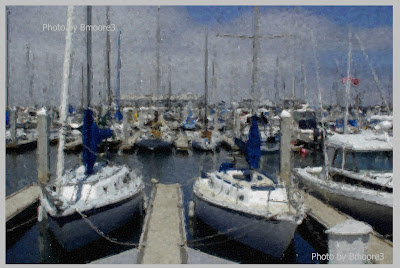
One of the projects I enjoy doing is converting a simple picture into a work of art. Several months back I took a class that told me that there is more to photography than just printing a good photo. One of the techniques I learned was how to take a photo and by using various programs, I could change what was once a picture (a photograph) into a work of art. Over the months I have converted several photos into art work, even adding matt and gloss gel medium to the top of the photo conversion using a small artist brush and layering the gel medium over the photo using the brush stokes created on the photo. The end result to this process (especially if I print the photo on canvas paper) is something that looks and has the feel of a hand painted piece of art. The gel goes on white and dries clear with a look that mimics a painter’s pallet stroke. There are additional techniques I can use to give the finished product a crackled look (as if it were very old).


Here are some examples of the steps I use to create the finished product. There is a video of the transformation at the end of this photo post.

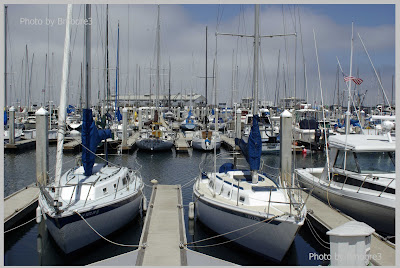
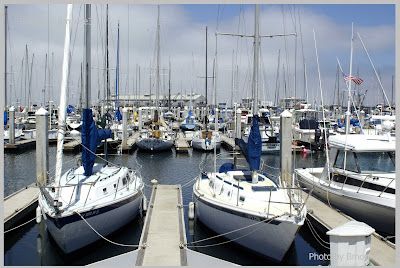
The first step, and one of the most important parts, is the actual taking of the photo (you have to start off with a good subject and photo to get the desired finished art look). I took this photo of twin sail boats that were docked in Monterey Bay Harbor. The photo was taken on August 15, 2007 around 1 P.M. (the fog bank was just off shore). Because of all the light and glare off the water, I used a polarizing filter. The ISO setting was 200 and the exposure was 1/180 of a second at F16 (the boats were brightly lit, however the background area was muted. I was about 35 feet away from the front of the boats and I used a focal length of 28mm (focal length in 35mm film is 42mm).

The second step was in my computer. There were a couple of areas that were under exposed so I bumped the exposure level up about 5%... not a whole lot, just enough to bring the whites out.


You will notice in the pictures that the photo went from a flat look to a more radiant white.
After the bump in the exposure level, I put the photo into PhotoShop CS and went to my filter menu. I have a program downloaded called “Alien Skin Snap Art” and within that program there are various types of artistic conversions (charcoal, pen and ink, pastel, posterization, and my favorite “Impasto”). I chose Impasto to convert my photo to look like a Monet style of painting. After adjusting the paint brush stoke length, texture, curvature, and a few other things that just take too long to explain, I print the photo on paper that gives me the desired look I want. Sometimes it’s high gloss professional photo paper, other times it’s matte, and at other times I use a canvas type of professional paper. Each type of paper gives the final photo a different look and feel… Sometimes I just have to do it the old “trial and error” way – print it and if it is what I like, I do the final step (the one that takes the longest amount of time and patience).

The final step is the gel. Like an artist (painter) I pick the furthest point in the photo and start the short painter’s strokes, building outward until the entire photo is covered in the gel medium. On an average 11 by 14 inch or 13 by 17 inch photo I might take up to an hour or even two to finish the strokes. On landscape photos it is much easier as nature is more forgiving than portraits. Those can take longer trying to match the texture of skin and hair. The time is worth it when you see the final piece. Its fun when someone asks you if you painted it and you explain that you didn’t and then tell them how it is a photograph conversion. I have an entire wall in my home where I have converted photos of my grandchildren into classical works of art.
Step two:


Step Three:
Step Four: The Conversion ~


Mavic Team ~ AMGEN TOUR 2008


With the 2009 AMGEN TOUR bike race about to kick off (February 14 through 22 with Modesto being the finish line for the San Jose to Modesto leg of the race – Tuesday February 17, 2009… finish line between 3:30 and 4:55 P.M. (depending on weather and road conditions), memories of the 2008 AMGEN TOUR came to mind.

Digging back to the February 20, 2008 photos of the tour, I came across several that I wanted to post. This one I liked so I thought I’d pop it in here. I took this at 9:58 A.M. while the riders and their teams were lining up and getting ready to start the Modesto leg of the race in front of the Gallo Center on I Street (just east of the “Water Wealth Contentment Health” arch). It had been raining earlier in the morning; there were clouds in the sky that said “more rain”... However, during this period between the rains, Modesto was amazingly dry. I lined up with the thousands of others who wanted to see and photograph the start. I was testing what ISO to use (as the clouds were playing trick with the light). I ended up setting it at 400. I know the racers would be flashing by in front of me and that I’d need a little faster speed. While waiting for some of the racers to arrive, I looked across “I” Street and saw one of the ride-along support teams (the one’s that can ride with the racers to repair the bikes if something should happen). This one was carrying extra wheels and other parts. As they went by, about 35 feet away, I set my focal length at 63mm (focal length in 35mm film equaled 94mm). I had adjusted the contrast setting to “+2” to get a richer color. I followed them for about 50 feet taking pictures as they passed. This shot enabled me to capture both riders and the extra tires on the back of their motorcycle. It helped that they were wearing bright yellow as it made the photo pop just a little.

This year, if I’m lucky, I’ll be able to go to San Jose and catch them at the start line again, or I may just go over to Del Puerto Canyon just west of Patterson, California and catch them as the round some of the hair-pin turns of this narrow canyon road from San Jose to Modesto. That should be somewhere around 2:30 P.M. Either way, I should have enough time to get back to Modesto to catch the racers crossing the finish line.

Sunday, December 21, 2008

ART OF THE BUILDING


Eureka, California is a very unique city. Here is a photo I took of the Arkley Center for the Performing Arts on September 15, 2007 at 5:44 P.M. The sun was south west of the building and it gave the building a golden tone. I did use a polarizing filter and set the ISO at 400. Because I wanted to capture the richness of the painting on the side of the building, I set the speed at 1/250 of a second and the F stop at 11. I stood with the sun slightly over my left shoulder and about 150 feet from the building. Focal length was 31mm (focal length in 35mm film terms was 46mm). I took this with a Pentax K10D camera. This is one town with a thousand locations to shoot. Very attention-grabbing setting. Bring lots of memory with you and charge those batteries.

Color, color, color…. For a fantastic splash of color, there is nothing like a trip to Duarte’s Poinsettias Nursery east of Ceres, California just before Christmas (mid-November on). They grow over sixty-thousand plants and 30 varieties and colors of poinsettias. I took this shot on an old Olympus Camedia C-4000 (4MB) point and shoot camera. The camera did most of the work; all I did was pick the subject and make sure what I saw, was something I liked. The control I had was the ISO (which I set to 100); the camera adjusted to 1/200 of a second at F2.8, and the focal length was at 68mm. No flash (there was plenty of light radiating through the overhead plastic panels). Nothing really technical here, just taking the time to find the grouping I wanted to take a photo of and getting close enough to capture the shot. Something so simple, yet so vibrant.

Friday, December 19, 2008

Villa Toscano Winery


In a remote small hillside, near the town of Plymouth, California, there is a winery that will take you away to the Tuscan hills of Northern Italy. The view from the winery across acres of rolling hills filled with grapevines and old oaks is breathtaking. The view of the winery is something also.


Ponds and Roman statues and a building right out of and Italian romance film. Villa Toscano Winery (off Hwy. 49 on Shenandoah Road) is beautiful any day of the year. It’s especially beautiful just after a good rain (and especially late in the day after a good rain).

This picture was taken on just such a day back on January 3, 2007 (about 1:49 P.M) and just between two giant storms. Again, being at the right place at the right time can (and for me often does) make for a better picture. This photo was taken with my DSLR camera with an exposure of 1/45 of a second at F/13. I was about 50 feet from the building and my lens focal length was 23mm (focal length in 35mm film is 34mm).

Any day is a great day to visit the Shenandoah Road wineries, however, if you want to avoid the crowded roads (and packed wineries), venture out on a day when the weatherperson says you can expect large cumulus clouds (you know the kind – those puffy cotton balls floating in the sky – the bigger, the better).

Thursday, December 18, 2008

For some special shots, you may want to make a video.

There are so many things you can do with one view and several exposures. Here is an example of the Barn at Deavers. Several exposures within just a few seconds and you can string them together and make a video, add music, play it on you PC and just loop it for a few minutes of relaxation and visual beauty...

St. Hilary's Church - Tiburon, California


It’s hard to describe the beauty at St. Hilary’s Church in Tiburon, California. Sitting on a hill, facing the west and the Golden Gate Bridge, you have some incredible views of the San Francisco Bay and Marin area. This church is simple, elegant and peaceful.
I was in Tiburon back on April 27, 2007 for a commercial shoot for PG&E. It was about 1:10 P.M.. I wasn't the photographer, just an actor/model in a commercial ad shoot. Because I was at the shoot location about an hour and a half early, I decided to take a look around this beautiful town. Rounding a curve in the road I saw this little old church perched on a bluff overlooking the town and the Bay. Winding through the streets I found it sitting at the end of an old worn out road.
No one was there, just me, and the church with the sun warming the front of the building. It was still early spring and everything was fresh. As usual, I had my camera with me. I set the ISO to 100, took a couple of quick shots to see what the best exposure was (ended up being 1/60 of a second at F22). Focal length was 28mm (focal length in 35mm equaled 42mm). I used a UV and Polarizing filter on the lens to soften the effect of the sun and intensify the sky. Click, click, click… There it was.
I’ll have to check back when there is a storm brewing on the Bay. Love those clouds


Some photographers try to narrow their field to specific areas. Some prefer portraits/people as their subject, other prefer landscapes, nature, birds, flowers, or still life. I try not to get too fixated on any one area. I was once told by a photographer friend of mine that if I want to shoot good pictures, I just needed to photograph what I like. Well, since I like all sorts of photographic environment, I just shoot whatever hits my eye that I think will look good.


Because so many things are not practical to shoot in their natural state, sometimes I find the need to just stage a shot. Still life photography really isn’t a difficult as it may seem. I look for color combinations that have similar hues and tones. If the arrangement looks good through the lens, you know, it might just look good in print. Here are a few examples of some still life photos I’ve arranged. As Ansel Adams was once quoted: “You don’t take a photograph, you make it.” I guess I took his simple words and used them to my advantage… if I don’t see it naturally, I “make it”.


The first still life photo is titled “A bottle of 04 Syrah and the fixings”. This was shot on a dinning room table with two 150 watt photo lamps (one on each side of the table) and a spot flash on the back for just a hint of sparkle. I used my DSLR with an ISO speed rating of 200. Focal length was 39mm (focal length in 35mm film was 58mm). Exposure was for 30 seconds at F22. The longer setting requires a tripod and a remote shutter release to insure the camera does not move during the exposure length.


Again, not a big expense, the lamps cost less than $150 and the background is just a dark velvet piece of material I got form one of the local sewing centers. During this one shoot I made well over 30 different arrangements. Doesn’t take much to keep me busy!


Some times I even convert the photos from just a photo to a work of art and print them on canvas photo paper. Their are just so many possibilitis when you're printing your photos. What use to cost a small fortune to have someone paint, you can create in just a couple of hours of creative work (by that point it isn't work, it's fun)...


Another one of my favorite shots to take is just before sunset or just after sun rise. The angle of the sun can make or break a shot. This one if of Lake Don Pedro (just East of La Grange, California off Hwy 132 (between Bonds Flat Road and Zarzamora St). Shot was taken on January 1, 2007 about 4:36 P.M.. Again, the DSLR Pentax ISO 100, Focal length 20mm (focal length at 35mm film was 30mm). Timing was 1/90 of a second at F6.7. Angled my camera parallel to the sun and shot across the lake with a slight fog/haze bank in the distance. The sun just played with the lake, hills, and sky. Timing was everything. A few minutes sooner or later would not have produced the same results. I was very lucky to be passing by when I did.

The Barn at Deavers Winery

I get a lot of joy when I see a storm coming. The bigger the clouds, the better I like it. This is a photo of the barn (thus the title: The Barn at Deavers Winery) at Deavers Winery in the Shenandoah Valley near Plymouth, California. This was shot about 12:46 PM on Saturday, December 17, 2008. I didn't have my DSLR with me (only my 8.1 MB Sony DSC-W150). Auto focus took this shot at a focal length of 5mm (talk about a wide angle) and F 3.3 (1/1000 of a second exposure). You really don't need an expensive camera to get a great shot. You just need to keep an eye open and if you see something that interests you, well, that's the time to stop and take the shot. This enlarges to an 11X14 print very nicely.

This picture is titled "Birds on the Beach in Flight" and was taken at the California State Park Beach at Half Moon Bay, California on July 29. 2008 at 10:04 A.M.. I used my Pentax K10D camera with an exposure setting of 1/250 second and a lens setting at f8. Shot it at while panning the birds as the took off around me. ISO was at 100, with a focal length of 115mm (that translated to 172mm with a focal length in 35mm film). Shot it with a spot metering mode and no flash for fill. Really didn't have a lot of time to think about the shot or focal length. Just pointed and paned and when the pelican was in view, click. This was the result.